Here we will be installing Softether VPN server on Ubuntu/Debian. After this is done you will be able to use this server as a VPN node and optionally open/forward ports to static internal IP’s.
We now have a custom Softether VPN install script to make this easy to install on any Debian/Ubuntu VPS. See here for simple installation.
https://whattheserver.com/softether-vpn-install-script_for-ubuntu/
Requirements
- VPS with static IP
- Ubuntu/Debian Server
- root or sudo access

Update the OS if not already done.
sudo apt-get update && sudo apt-get upgrade
Install essentials
apt-get install build-essential libssl-dev g++ openssl libpthread-stubs0-dev gcc-multilib
Grab latest Softether link for Linux x64 from here
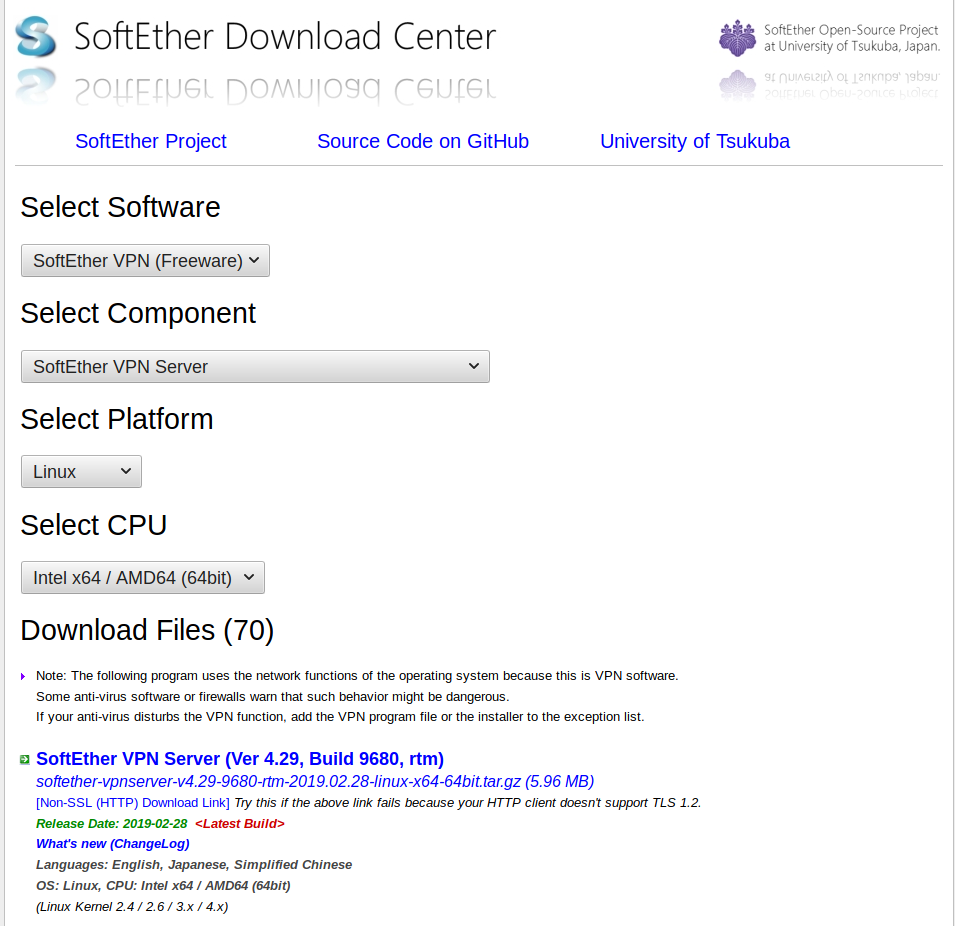
Use wget to copy it directly onto the server.
wget https://github.com/SoftEtherVPN/SoftEtherVPN_Stable/releases/download/v4.29-9680-rtm/softether-vpnserver-v4.29-9680-rtm-2019.02.28-linux-x64-64bit.tar.gz
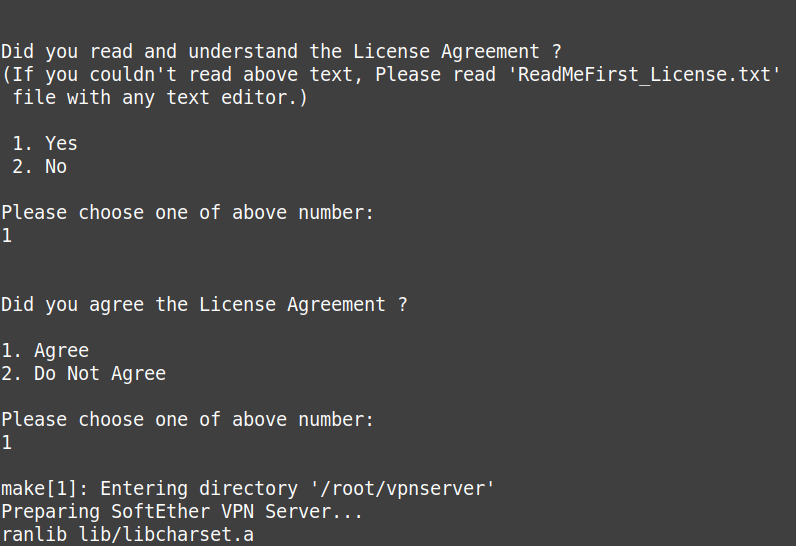
Extract it. Enter directory and run make and agree to all license agreements:
tar xvf softether-vpnserver-v*
cd vpnserver
make
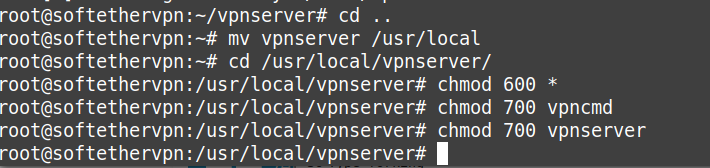
Move up and then copy Softether libs to /usr/local
cd ..
mv vpnserver /usr/local
cd /usr/local/vpnserver/
chmod 600 *
chmod 700 vpncmd
chmod 700 vpnserver
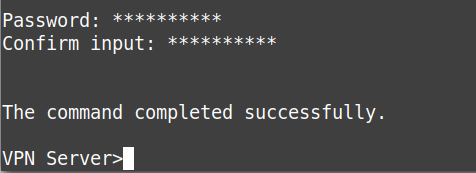
Set the server admin password
./vpncmd
1
enter
enter
VPN Server>ServerPasswordSet
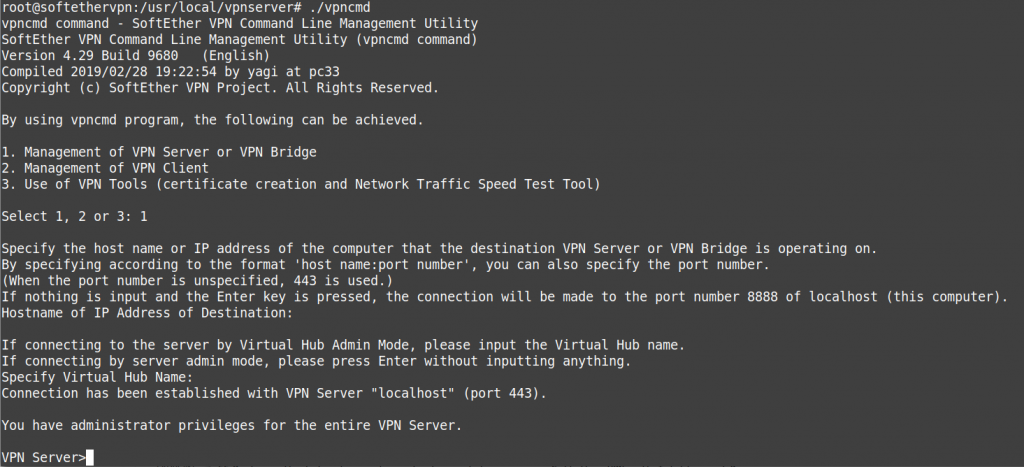

Enter the admin password twice to save. Then type exit to quit.
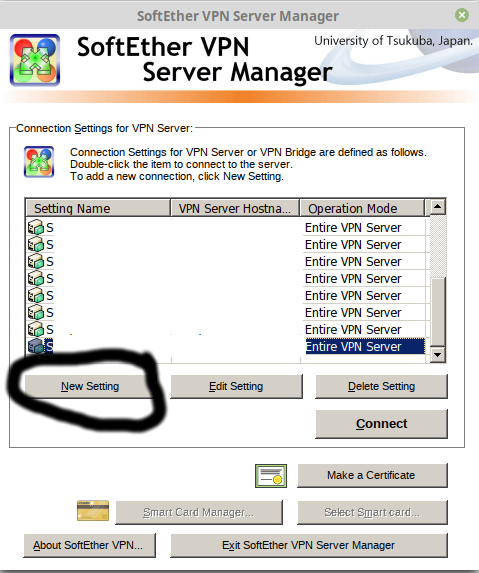
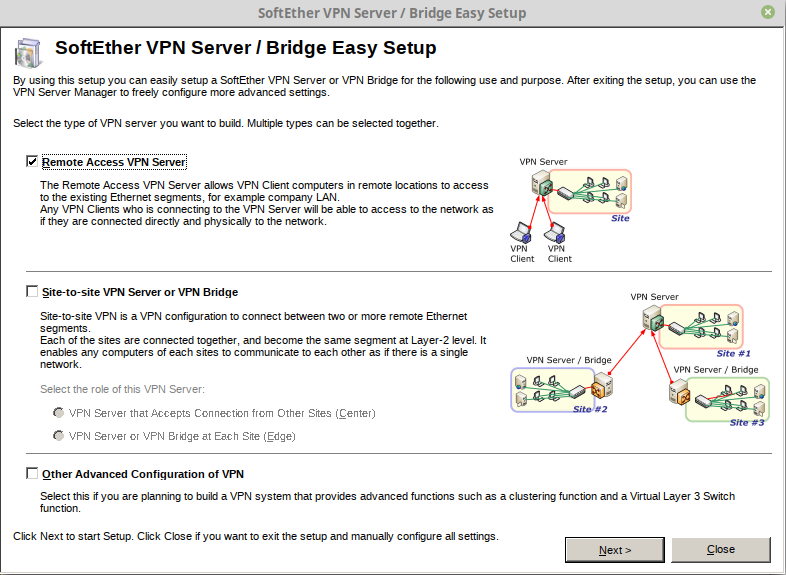
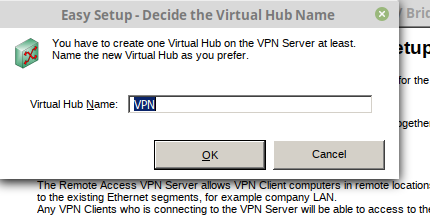
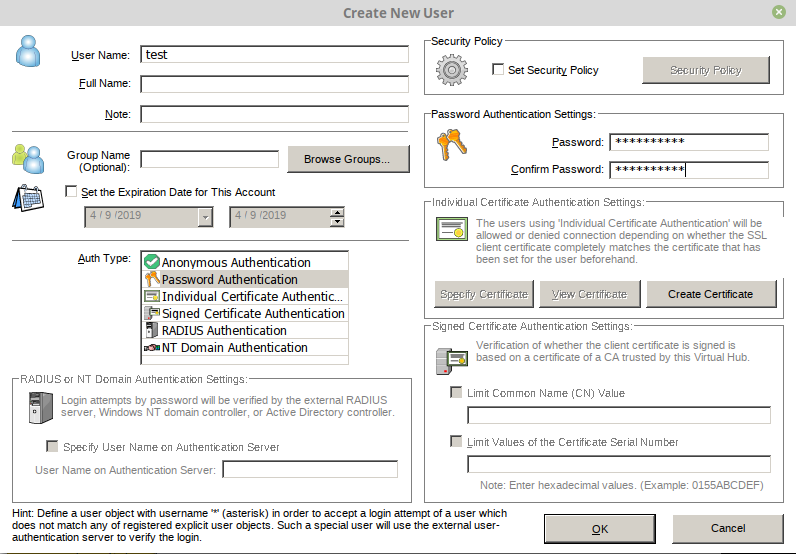
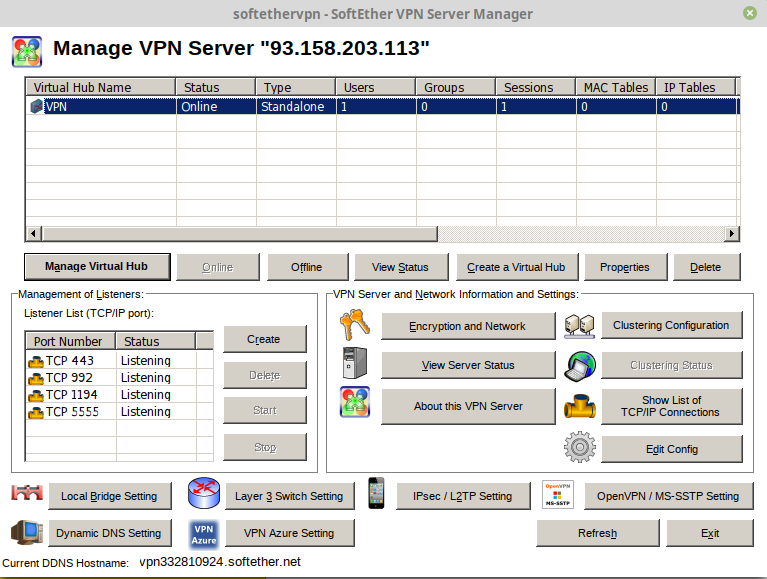
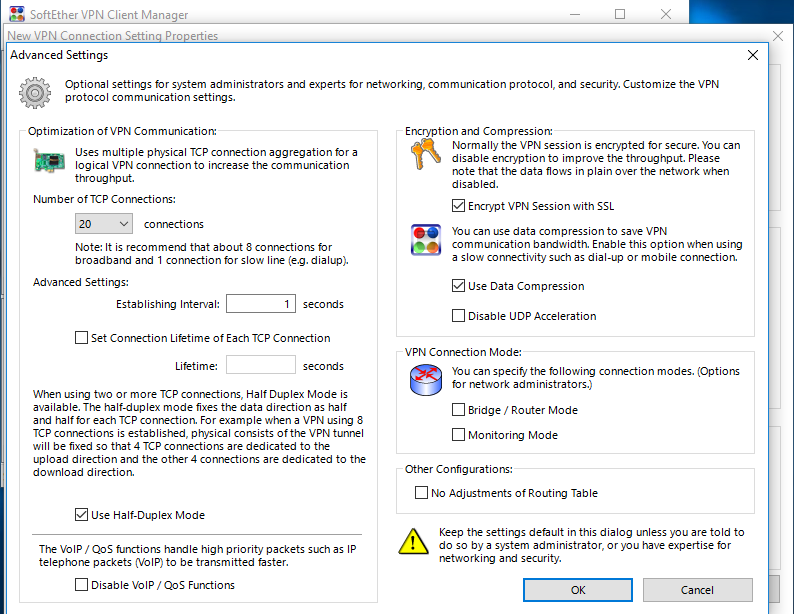
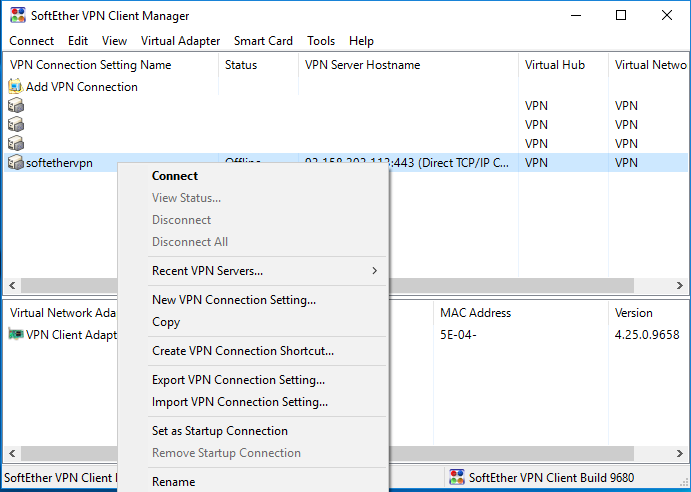
I use the windows Softether VPN Server Manager Client for doing the settings. It actually works great in Wine/PlayonLinux for those running Linux for daily use. Can find latest version here

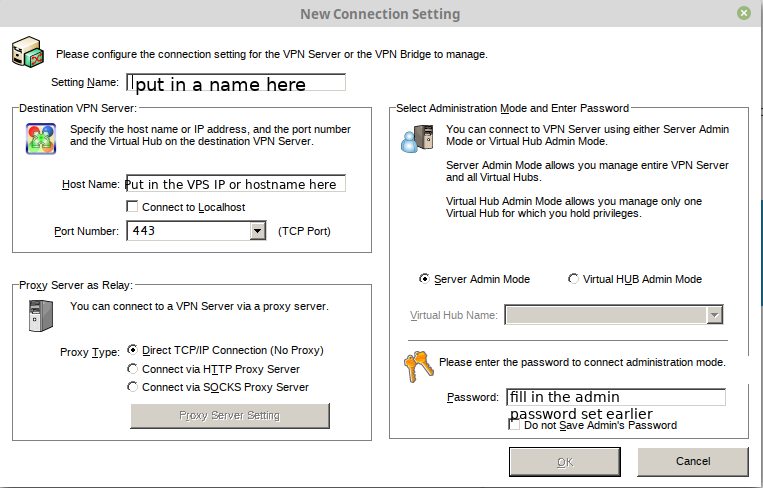
Install it, run it, click New setting. Input ip and password.


Create systemd init file for Softether VPN service. This will control start, stop, and restart Softether service IPtables and DNSmasq service.
sudo nano /lib/systemd/system/vpnserver.service
Paste in the below to create systemd script for managing Softether VPN with Iptables and Dnsmasq
[Unit]
Description=SoftEther VPN Server
After=network.target


[Service]
Type=forking
ExecStart=/usr/local/vpnserver/vpnserver start
ExecStop=/usr/local/vpnserver/vpnserver stop
ExecStartPost=/bin/sleep 05
ExecStartPost=/bin/bash /root/softether-iptables.sh
ExecStartPost=/bin/sleep 03
ExecStartPost=/bin/systemctl start dnsmasq.service
ExecReload=/bin/sleep 05
ExecReload=/bin/bash /root/softether-iptables.sh
ExecReload=/bin/sleep 03
ExecReload=/bin/systemctl restart dnsmasq.service
ExecStopPost=/bin/systemctl stop dnsmasq.service
Restart=always

[Install]
WantedBy=multi-user.target
ctrl-o ret ctrl-x
To grab this file ready to go:
wget -O /lib/systemd/system/vpnserver.service https://whattheserver.me/softether-scripts/vpnserver.service
Setup Iptables by creating bash script to automate the iptables needed for VPN.
nano /root/softether-iptables.sh
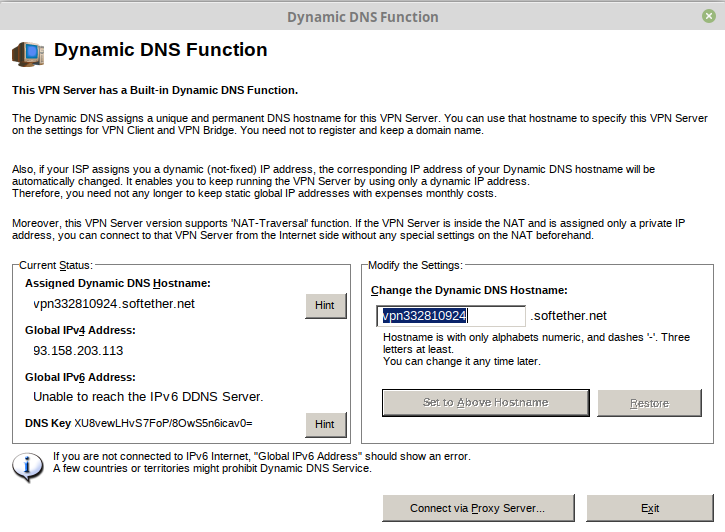
Paste in the below code. Make sure “NET_INTERFACE=ens18” matches your net interface and “VPNEXTERNALIP=93.158.203.113” has your public IPv4 instead of the example “93.158.203.113” noted from the beginning of the tutorial.
#!/bin/bash
##########################################################################################################################################
### Configuration
#############################

TAP_ADDR=192.168.30.1                              # Main IP of your TAP interface
TAP_INTERFACE=tap_soft                     # The name of your TAP interface.
VPN_SUBNET=192.168.30.0/24                         # Virtual IP subnet you want to use within your VPN
NET_INTERFACE=ens18                              # Your network adapter that connects you to the world.In OpenVZ this is venet0 for example.
#IPV6_ADDR=2B00:1DA7:002B:0007:0000:0000:0000:0001      # You can also assign this as DNS server in dnsmasq config.
#IPV6_SUBNET=2B00:1DA7:2B:7::/64               # Used to assign IPv6 to connecting clients. Remember to use the same subnet in dnsmasq.conf
VPNEXTERNALIP=93.158.203.113                  # Your machines external IPv4 address.
                                                # Write down you IP or one of the IP adresses if you have more than one.
                                                # Warning! NAT Machine users, here write the local IP address of your VPS instead of the external IP.
#############################
### End of Configuration
##########################################################################################################################################

#Flush Current rules
iptables -F && iptables -X
#######################################################################################
# Base SoftEther VPN Rules for IPTables. You can remove and use these iptables-persistent if you want
#######################################################################################
# Assign $TAP_ADDR to our tap interface
/sbin/ifconfig $TAP_INTERFACE $TAP_ADDR
#
# Forward all VPN traffic that comes from VPN_SUBNET through $NET_INTERFACE interface for outgoing packets.
iptables -t nat -A POSTROUTING -s $VPN_SUBNET -j SNAT --to-source $VPNEXTERNALIP
# Alternate rule if your server has dynamic IP
#iptables -t nat -A POSTROUTING -s $VPN_SUBNET -o $NET_INTERFACE -j MASQUERADE
#
# Allow VPN Interface to access the whole world, back and forth.
iptables -A INPUT -m state --state ESTABLISHED,RELATED -j ACCEPT
iptables -A OUTPUT -m state --state ESTABLISHED,RELATED -j ACCEPT
iptables -A FORWARD -m state --state ESTABLISHED,RELATED -j ACCEPT
#
iptables -A INPUT -s $VPN_SUBNET -m state --state NEW -j ACCEPT
iptables -A OUTPUT -s $VPN_SUBNET -m state --state NEW -j ACCEPT
iptables -A FORWARD -s $VPN_SUBNET -m state --state NEW -j ACCEPT
#
# IPv6
# This is the IP we use to reply DNS requests.
#ifconfig $TAP_INTERFACE inet6 add $IPV6_ADDR
#
# Without assigning the whole /64 subnet, Softether doesn't give connecting clients IPv6 addresses.
#ifconfig $TAP_INTERFACE inet6 add $IPV6_SUBNET
#
# Let's define forwarding rules for IPv6 as well...
#ip6tables -A INPUT -m state --state ESTABLISHED,RELATED -j ACCEPT
#ip6tables -A FORWARD -m state --state ESTABLISHED,RELATED -j ACCEPT
#ip6tables -A OUTPUT -m state --state ESTABLISHED,RELATED -j ACCEPT
#ip6tables -A FORWARD -j ACCEPT
#ip6tables -A INPUT -j ACCEPT
#ip6tables -A OUTPUT -j ACCEPT

# You can enable this for kernels 3.13 and up
#ip6tables -t nat -A POSTROUTING -o tap_soft -j MASQUERADE
#######################################################################################
#	End of Base IPTables Rules
#######################################################################################
Make script executable.
chmod +x /root/softether-iptables.sh
Install DNSmasq DHCP server. This is required for the tutorial and helps improve the speed over using the SecureNat/DHCP builtin function of Softether. This is also needed if wanting to open or forward ports and set internal static IP’s.
apt-get install dnsmasq
Backup the default dnsmasq.conf
mv /etc/dnsmasq.conf /etc/dnsmasq.conf-bak
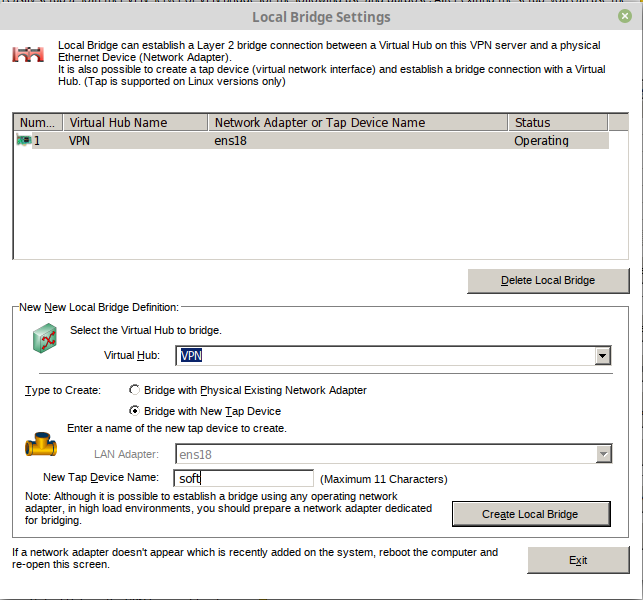
Create new /etc/dnsmasq.conf. Make sure your Tap Adapter matches “interface=tap_soft” and Interface “except-interface=ens18”. If you have been following the rest of the tutorial the rest of the stuff is already setup to match network.
nano /etc/dnsmasq.conf
paste in the below
################################################################################## Interface Settings

# Listen to interface
# In this case it is the Softether bridge
interface=tap_soft

# Don't ever listen to anything on eth0, you wouldn't want that.
except-interface=ens18

# In case you have bind on your server and doesn't want dnsmasq to use the default dns port #53:
# port=5353

listen-address=192.168.30.1
bind-interfaces
################################################################################## Options

# Let's give the connecting clients an internal IP
dhcp-range=tap_soft,192.168.30.10,192.168.30.200,720h

# Default route and dns
dhcp-option=tap_soft,3,192.168.30.1

# enable dhcp
dhcp-authoritative

# enable IPv6 Route Advertisements
enable-ra

#  have your simple hosts expanded to domain
expand-hosts

# Let dnsmasq use the dns servers in the order you chose.
strict-order

# Let's try not giving the same IP to all, right?
dhcp-no-override

# Let's assign a unique and real IPv6 address to all clients.
# Here, we are using the IPv6 addresses from the he-ipv6 interface (Hurricane Electric ipv6 tunnel)
# You should replace it with your own IP range.
# This way even if you have only 1 shared IPv4
# All of your clients can have a real and unique IPv6 address.
# you can try slaac,ra-only | slaac,ra-names | slaac,ra-stateless in case you have trouble connecting
#dhcp-range=tap_soft,2B00:1DA7:002B:0007:0000:0000:0000:0001,2B00:1DA7:002B:0007:FFFF:FFFF:FFFF:FFFF,ra-advrouter,slaac,64,infinite

# For tunnelbroker, assign your 1f14 ip address to the tunnel interface and use 1f15 routable addresses in softether and dnsmasq
#dhcp-range=tap_soft,2001:0470:1f15:XXXX:0000:0000:000:0011,2001:0470:1f15:XXXX:0000:0000:0000:ffff,slaac,ra-stateless,64,2d


# Let's advertise ourself as a DNSSec server.
# Since we're running in the VPN network this shouldn't be any problem.
# Copy the DNSSEC Authenticated Data bit from upstream servers to downstream clients and cache it.
# This is an alternative to having dnsmasq validate DNSSEC, but it depends on the security of the network
# between dnsmasq and the upstream servers, and the trustworthiness of the upstream servers.
#proxy-dnssec

# The following directives prevent dnsmasq from forwarding plain names (without any dots)
# or addresses in the non-routed address space to the parent nameservers.
domain-needed

# Never forward addresses in the non-routed address spaces
bogus-priv


# blocks probe-machines attack
stop-dns-rebind
rebind-localhost-ok

# Set the maximum number of concurrent DNS queries. The default value is 150. Adjust to your needs.
dns-forward-max=300

# stops dnsmasq from getting DNS server addresses from /etc/resolv.conf
# but from below
no-resolv
no-poll

# Prevent Windows 7 DHCPDISCOVER floods
# http://brielle.sosdg.org/archives/522-Windows-7-flooding-DHCP-server-with-DHCPINFORM-messages.html
dhcp-option=252,"\n"

################################################################################## External DNS Servers
# Use this DNS servers for incoming DNS requests
server=208.67.222.222
server=208.67.220.220
server=8.8.4.4

# Use these IPv6 DNS Servers for lookups/ Google and OpenDNS
server=2620:0:ccd::2
server=2001:4860:4860::8888
server=2001:4860:4860::8844
#########################################


################################################################################## Client DNS Servers
# Let's send these DNS Servers to clients.
# The first IP is the IPv4 and IPv6 addresses that are already assigned to the tap_soft
# So that everything runs through us.
# This is good for caching and adblocking.

# Set IPv4 DNS server for client machines # option:6
dhcp-option=option:dns-server,192.168.30.1,176.103.130.130

# Set IPv6 DNS server for clients
# You can change the first IP with the ipv6 address of your tap_soft if you
# want all dns queries to go through your server...
dhcp-option=option6:dns-server,[2a00:5a60::ad2:0ff],[2a00:5a60::ad1:0ff]
#########################################


######################################### TTL & Caching options

# How many DNS queries should we cache? By defaults this is 150
# Can go up to 10k.
cache-size=10000

# Negative caching allows dnsmasq to remember 'no such domain' answers from the parent nameservers,
# so it does not query for the same non-existent hostnames again and again.
# This is probably useful for spam filters or MTA services.
#no-negcache

# The neg-ttl directive sets a default TTL value to add to negative replies from the parent nameservers,
# in case these replies do not contain TTL information.
# If neg-ttl is not set and a negative reply from a parent DNS server does not contain TTL information,
# then dnsmasq will not cache the reply.
neg-ttl=80000
local-ttl=3600

# TTL
dhcp-option=23,64
#########################################


################################################################################## MISC
# Send microsoft-specific option to tell windows to release the DHCP lease
# when it shuts down. Note the "i" flag, to tell dnsmasq to send the
# value as a four-byte integer - that's what microsoft wants. See
dhcp-option=vendor:MSFT,2,1i

#########################################
## 44-47 NetBIOS
dhcp-option=44,192.168.30.1 # set netbios-over-TCP/IP nameserver(s) aka WINS server(s)
dhcp-option=45,192.168.30.1 # netbios datagram distribution server
dhcp-option=46,8         # netbios node type
dhcp-option=47


# IF you want to give clients the same static internal IP,
# you should create and use use /etc/ethers for static hosts;
# same format as --dhcp-host
# <hwaddr> [<hostname>] <ipaddr>
read-ethers


# Additional hosts, for adblocking.
# You can create that file yourself or just download and run:
# https://github.com/nomadturk/vpn-adblock/blob/master/updateHosts.sh
#addn-hosts=/etc/hosts.supp

log-facility=/var/log/dnsmasq.log
log-async=5


################################################################################## Experimental
log-dhcp
quiet-dhcp6
#dhcp-option=option:router,192.168.30.1
#dhcp-option=option:ntp-server,192.168.30.1

# With settings below, you can ping other clients on your lan.
#dhcp-option=option:domain-search,lan
#dhcp-option=option6:domain-search,lan
#domain=YOURDOMAINHERE
# Gateway
dhcp-option=3,192.168.30.1
Setup Sysctl for IPv4 and optional Ipv6 forwarding.
wget -O /root/sysctl-forwarding.sh https://whattheserver.me/softether-scripts/sysctl-forwarding.sh; chmod a+x sysctl-forwarding.sh && bash sysctl-forwarding.sh;
Or alternatively this can be done manually via nano.
nano /etc/sysctl.conf
Paste in the below block for IPv4 and optionally IPv6 if setting up dualstack IPv6 VPN.
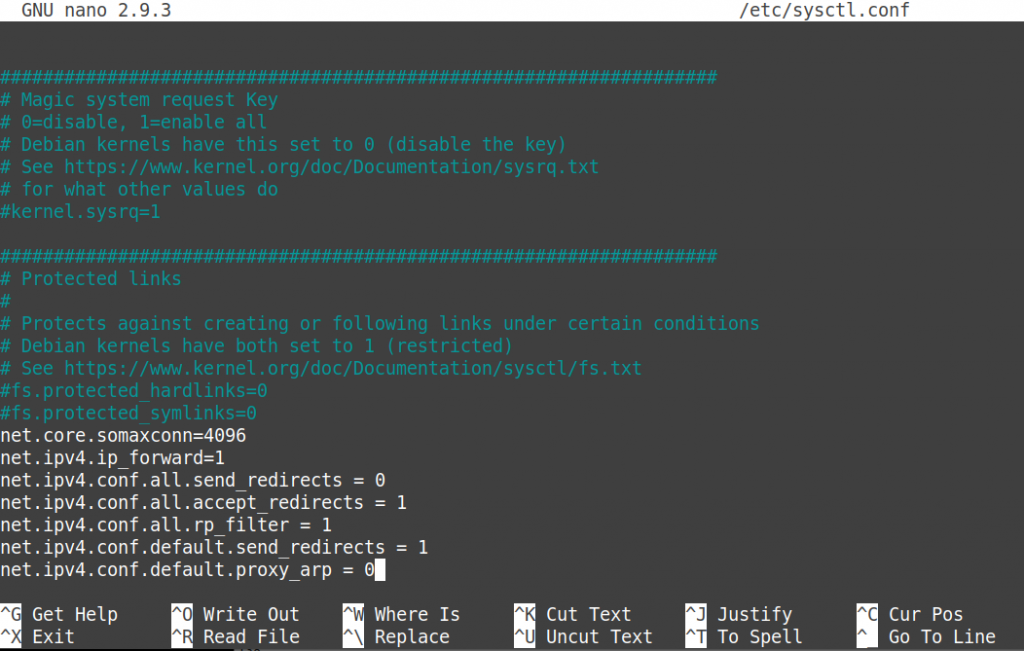
net.core.somaxconn=4096
net.ipv4.ip_forward=1
net.ipv4.conf.all.send_redirects = 0
net.ipv4.conf.all.accept_redirects = 1
net.ipv4.conf.all.rp_filter = 1
net.ipv4.conf.default.send_redirects = 1
net.ipv4.conf.default.proxy_arp = 0

net.ipv6.conf.all.forwarding=1
net.ipv6.conf.default.forwarding = 1
net.ipv6.conf.tap_softether.accept_ra=2 # IF you named your tap interface other than softether, change this value.
net.ipv6.conf.all.accept_ra = 1
net.ipv6.conf.all.accept_source_route=1
net.ipv6.conf.all.accept_redirects = 1
net.ipv6.conf.all.proxy_ndp = 1
And save it.
CTRL + O
CTRL + X
Run the below to apply the rules. A Reboot also may be required in some cases.
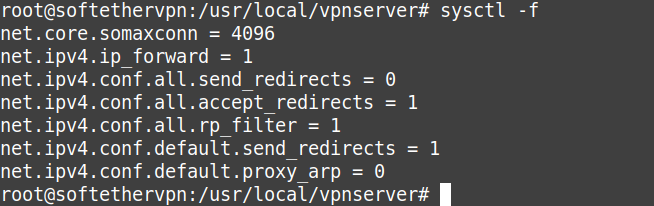
sysctl -f
Alright now for the fun part. We are going to enable and startup up the Softether VPN service we created earlier.
To enable, start,and check status of the systemd Softether vpn service.
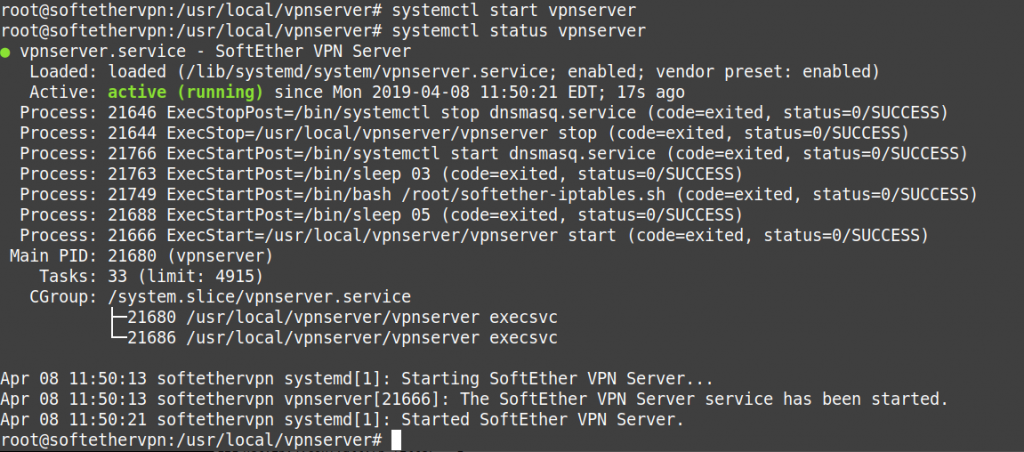
systemctl enable vpnserver
systemctl enable dnsmasq
systemctl start vpnserver
systemctl status vpnserver
To enable, start,and check status of the systemd dnsmasq dhcp service.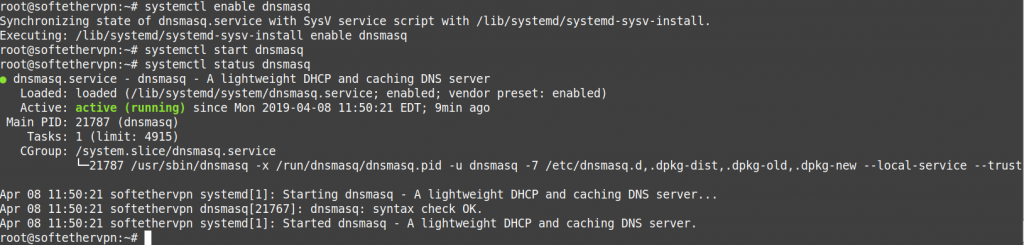
systemctl start dnsmasq
systemctl status dnsmasq
systemctl restart dnsmasq
Check Iptables.
iptables --list
It should look like this.
root@softethervpn:~# iptables --list
Chain INPUT (policy ACCEPT)
target     prot opt source               destination
ACCEPT     all  --  anywhere             anywhere             state RELATED,ESTABLISHED
ACCEPT     all  --  192.168.30.0/24      anywhere             state NEW

Chain FORWARD (policy ACCEPT)
target     prot opt source               destination
ACCEPT     all  --  anywhere             anywhere             state RELATED,ESTABLISHED
ACCEPT     all  --  192.168.30.0/24      anywhere             state NEW

Chain OUTPUT (policy ACCEPT)
target     prot opt source               destination
ACCEPT     all  --  anywhere             anywhere             state RELATED,ESTABLISHED
ACCEPT     all  --  192.168.30.0/24      anywhere             state NEW
root@softethervpn:~#
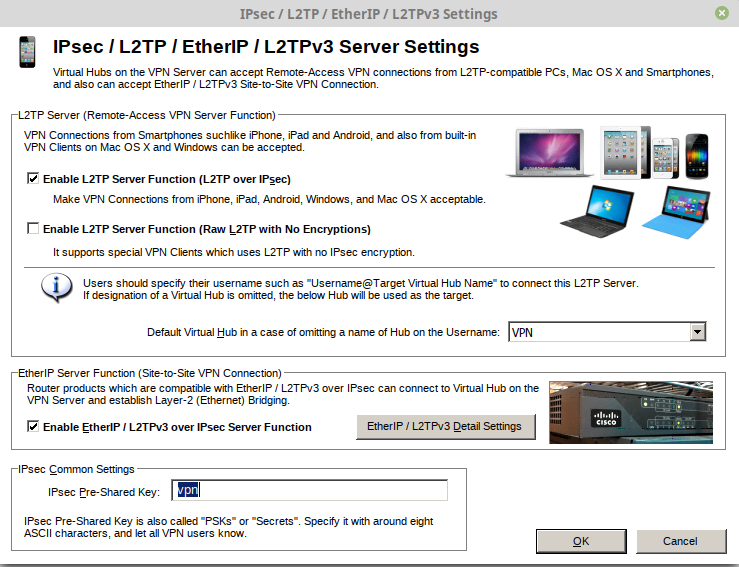
Now the VPN server is working and should be accessible. Please install SoftEther VPN client or your

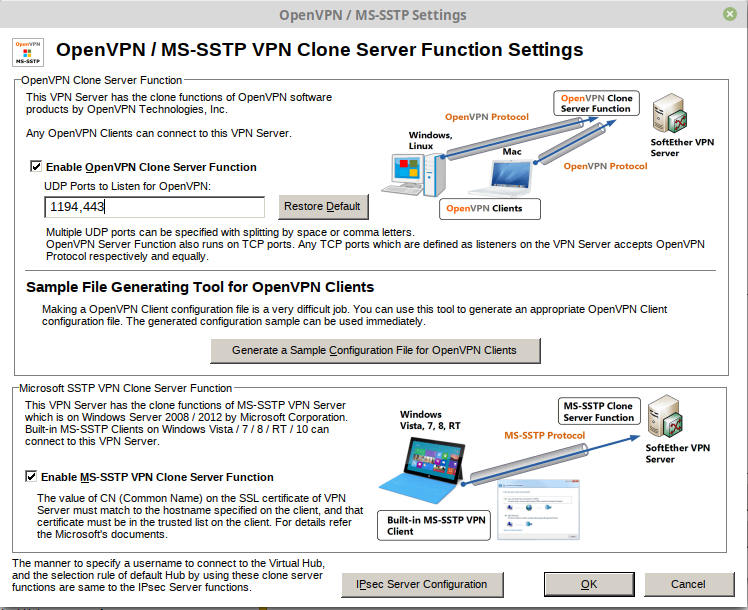
Now you have an adblocking Softether VPN Server setup which can be used from 6 protocols.
To
To setup static IP’s for port forwarding the
We will then need to create a file called “/etc/ethers”
nano /etc/ethers
Paste in the MAC Address and the internal IP to assign in the format below
macaddress internalip
So if the Mac Address is “5e:04:e5:79:e9
5e:04:e5:79:e9:fa 192.168.30.145This Mac address is autogenerated by the VPN client in most cases and can be manually specified or changed in most OS’s. Once you have this assigned and saved. We need to reload the
systemctl daemon-reload; systemctl stop dnsmasq.service; systemctl start dnsmasq.service;systemctl restart vpnserver;
Once that is done and you have connected again check to ensure its assigning this internal IP each time from this device. If that is good then we can move onto the next step which is opening the desired ports.
#Example "93.158.203.114" is VPN node IP. Port to forward is "2634". Client's static internal IP "192.168.30.145"
#iptables -t nat -A PREROUTING -d 93.158.203.114 -p tcp --dport 2634 -j DNAT --to-dest 192.168.30.145:2634
#iptables -t filter -A INPUT -p tcp -d 192.168.30.145 --dport 2634 -j ACCEPT

#iptables -t nat -A PREROUTING -d $YOUREXTERNALIP -p tcp --dport $port -j DNAT --to-dest $ClientInternalIP:$port
#iptables -t filter -A INPUT -p tcp -d $ClientInternalIP --dport $port -j ACCEPT
The $ClientInternalIP and $port will need to be filled in and then appended to the /root/
bash /root/softether-iptables.sh
Then check Iptables
iptables --list
It will show that its forwarded in the Iptables like the below example if executed properly.
# iptables --list
Chain INPUT (policy ACCEPT)
target     prot opt source               destination
ACCEPT     all  --  anywhere             anywhere             state RELATED,ESTABLISHED
ACCEPT     all  --  192.168.30.0/24      anywhere             state NEW
ACCEPT     tcp  --  anywhere             192.168.30.145       tcp dpt:2634


Chain FORWARD (policy ACCEPT)
target     prot opt source               destination
ACCEPT     all  --  anywhere             anywhere             state RELATED,ESTABLISHED
ACCEPT     all  --  192.168.30.0/24      anywhere             state NEW

Chain OUTPUT (policy ACCEPT)
target     prot opt source               destination
ACCEPT     all  --  anywhere             anywhere             state RELATED,ESTABLISHED
ACCEPT     all  --  192.168.30.0/24      anywhere             state NEW
:~#
Well we hope you enjoyed the tutorial. If your looking for a quality KVM VPS to run your own VPN server or other hosting needs we offer Proxmox SSD based VPS’s in amsterdam with excellent peering Ipv4/Ipv6 support at amazing prices. See our lineup here
Category:KVM VPS HostingPrivacyProxySoftEtherUncategorized