In this brief
Here are two different ways to rapidly install Memcached for Centos.
Option 1: Install via EA4 Experimental rep
yum install -y ea4-experimental; sed -i "s/enabled=1/enabled=0/g" /etc/yum.repos.d/EA4-experimental.repo;yum --enablerepo=EA4-experimental install -y memcached libmemcached libmemcached-devel ea-php7*-php-memcache ea-php7*-php-memcached;
sed -i 's/^OPTIONS.*/OPTIONS="-U 0 -l 127.0.0.1"/g' /etc/sysconfig/memcached;
sed -i 's/^CACHESIZE.*/CACHESIZE="512"/g' /etc/sysconfig/memcached;
systemctl enable memcached && systemctl start memcached || chkconfig memcached on && service memcached restart;
sudo ps -eaf | grep memcached;
Option 2: Install via PECL
yum install memcached libmemcached libmemcached-devel -y;
for version in $(ls /opt/cpanel|grep ea-php); do /opt/cpanel/${version}/root/usr/bin/pecl channel-update pecl.php.net; done;
for PHP in $(ls -h /opt/cpanel |grep ea-php); do printf '\n' |/opt/cpanel/$PHP/root/usr/bin/pecl install memcached; done
sed -i 's/^OPTIONS.*/OPTIONS="-U 0 -l 127.0.0.1"/g' /etc/sysconfig/memcached;
sed -i 's/^CACHESIZE.*/CACHESIZE="512"/g' /etc/sysconfig/memcached;
systemctl enable memcached && systemctl start memcached || chkconfig memcached on && service memcached restart;
sudo ps -eaf | grep memcached;
If you want the long detailed explanation see the section following for step by step for what everything is doing
To install
yum install memcached libmemcached-devel -y
We now need to make one minor edit to the configuration file to ensure that the
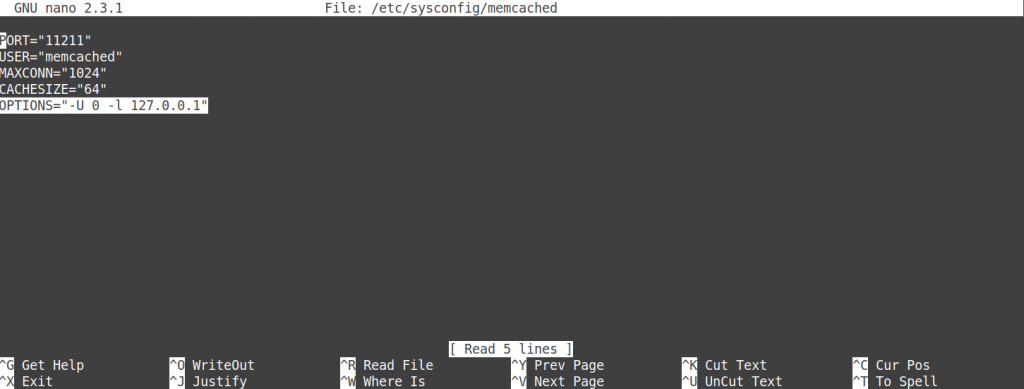
Open up the configuration file by using the below command.
nano /etc/sysconfig/memcached

OPTIONS=””
Find the last line where it shows: OPTIONS=”” and change it to the below. and save and exit.
OPTIONS="-U 0 -l 127.0.0.1"
Here is a one-liner to fix that via sed.
sed -i 's/^OPTIONS.*/OPTIONS="-U 0 -l 127.0.0.1"/g' /etc/sysconfig/memcached
Now we can enable and start the memcached service. Use the below commands to enable and start.
systemctl enable memcached; systemctl start memcached;
We can now check the status with the below commands via systemd or via checking for the process.

systemctl status memcached
ps -eaf | grep memcached
Now that the
So for PHP 7.0, 7.1, 7.2, and PHP 7.3. the below commands will install for all those versions. The beginning “
printf ‘\n’ | /opt/cpanel/ea-php70/root/usr/bin/pecl install memcached
printf ‘\n’ | /opt/cpanel/ea-php71/root/usr/bin/pecl install memcached
printf ‘\n’ | /opt/cpanel/ea-php72/root/usr/bin/pecl install memcached
printf ‘\n’ | /opt/cpanel/ea-php73/root/usr/bin/pecl install memcached
Now that the PHP extensions are installed we need to restart Apache
service httpd restart
systemctl restart httpd
Once installed you can check all versions of PHP for memcached php extension with the below command.

for phpver in $(ls -1 /opt/cpanel/ |grep ea-php | sed 's/ea-php//g') ; do
echo "PHP $phpver" ; /opt/cpanel/ea-php$phpver/root/usr/bin/php -m |grep memcached;
done
If everything went well you will be able to see output like the below showing memcached is installed for all the PHP versions you selected.
[root@gcloud /]# for phpver in $(ls -1 /opt/cpanel/ |grep ea-php | sed 's/ea-php//g') ; do
> echo "PHP $phpver" ; /opt/cpanel/ea-php$phpver/root/usr/bin/php -m |grep memcached;
> done
PHP 70
memcached
PHP 71
memcached
PHP 72
memcached
PHP 73
memcached
[root@gcloud /]#
There you have it the easiest way to install memcached daemon and php for all versions of PHP 7 without all sorts of workarounds needed.
We sell high performance KVM VPS hosting which is perfect for hosting your own badass cPanel with memcached installation. So if your looking for shared hosting with this already enabled or a VPS we got you covered.

Category:cPanelKVM VPS HostinglinuxWordpress
